Silencing the Moto Tag 2 for Bike Tracking
— Hardware, Teardown, Disassembly, How-To, Moto Tag 2 — 4 min read
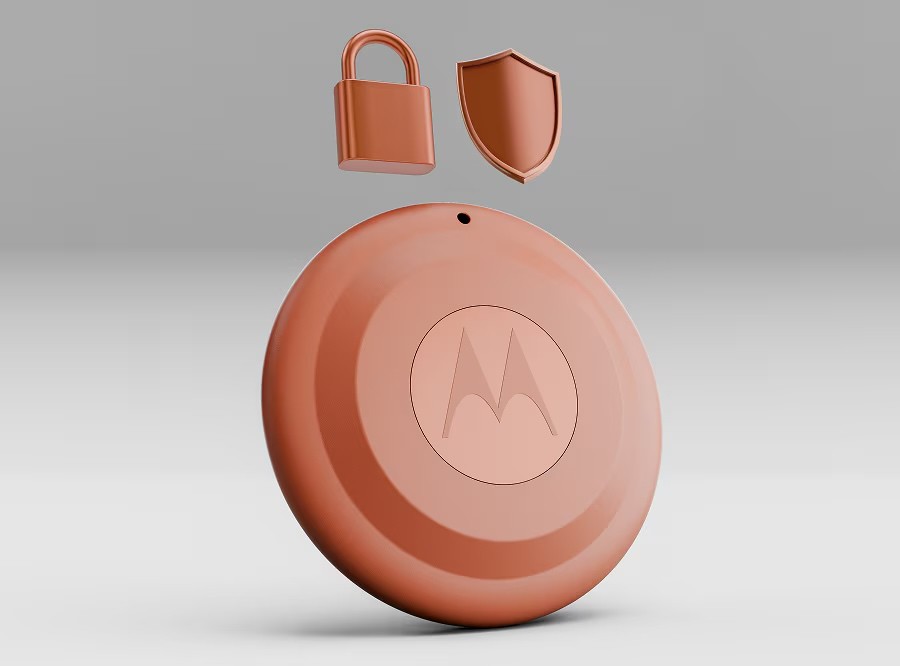
My girlfriend and I enjoy biking around Austin, but had no reliable way to track our bikes if stolen.
While smart trackers like the Apple AirTag and Moto Tag are great for finding misplaced keys, they are not designed for anti-theft tracking. To prevent unwanted tracking, Apple and Google established the DULT standard, which pushes "unknown tracker traveling with you" alerts to nearby phones. Once alerted, a thief can simply trigger a chime to find and remove a hidden tag.
While bypassing the phone alerts isn't possible (or desirable), we can eliminate the chime. Even if a thief receives a notification, a silenced tag prevents them from using audio to pinpoint where it is on the bike.
Here is a quick, fully reversible hardware mod to permanently silence the Moto Tag 2.
Disclaimers & Notes:
- Intended Use: This modification is strictly for personal asset tracking and securing your own property. Do not use this method to track individuals.
- Liability: Proceed at your own risk. I am not responsible for damaged devices or voided warranties.
- Waterproofing: This teardown requires prying open the casing, which breaks the IP68 ultrasonic seal. This is generally fine for bike tracking, as most dedicated bike mounts feature their own waterproof rubber O-rings and sealed enclosures.
Why the Moto Tag 2?
We briefly considered dedicated GPS bike trackers and LoRa mesh technology, but settled on the Moto Tag 2:
- Google Find My Device Network: Leverages the crowdsourced Android network. We both use Google Pixels and the Google network is decent in Austin TX.
- Replaceable CR2032 Battery: Easy yearly battery swaps.
- AirTag Form Factor: Exact same dimensions as an Apple AirTag, making it 100% compatible with existing AirTag bike mounts.
- UWB & Bluetooth Channel Sounding: Nice to have for precision finding of my luggage, though less critical for a bike. On the bright side, a thief cannot use UWB to locate unknown trackers.
- Cost: On sale, $79.99 + $5.00 shipping for a 4 pack, significantly cheaper than cellular GPS trackers or LoRa devices.
Tools Required
- Moto Tag 2 Pin Tool: The SIM-style pin tool included in the retail box.
- Sharp Razor Blade / Utility Knife: For separating the inner plastic casing seam.
- #0000 (PH0000) Phillips Screwdriver: For the two internal PCB retention screws.
- Scotch Tape or Kapton Tape: Non-conductive insulating barrier.
Step-by-Step Teardown & Mod
Step 1: Remove the Outer Cover & Battery
Use the pin tool included in the box to depress the battery door release and twist open the back cover, following Motorola's official battery replacement method.
Set the CR2032 battery aside.
Step 2: Remove the PCB Retention Screws
The circular PCB and casing is held in place by two micro screws anchored into brass threaded inserts. Remove both screws using a #0000 Phillips screwdriver.
Step 3: Split the Inner Sealed Shell
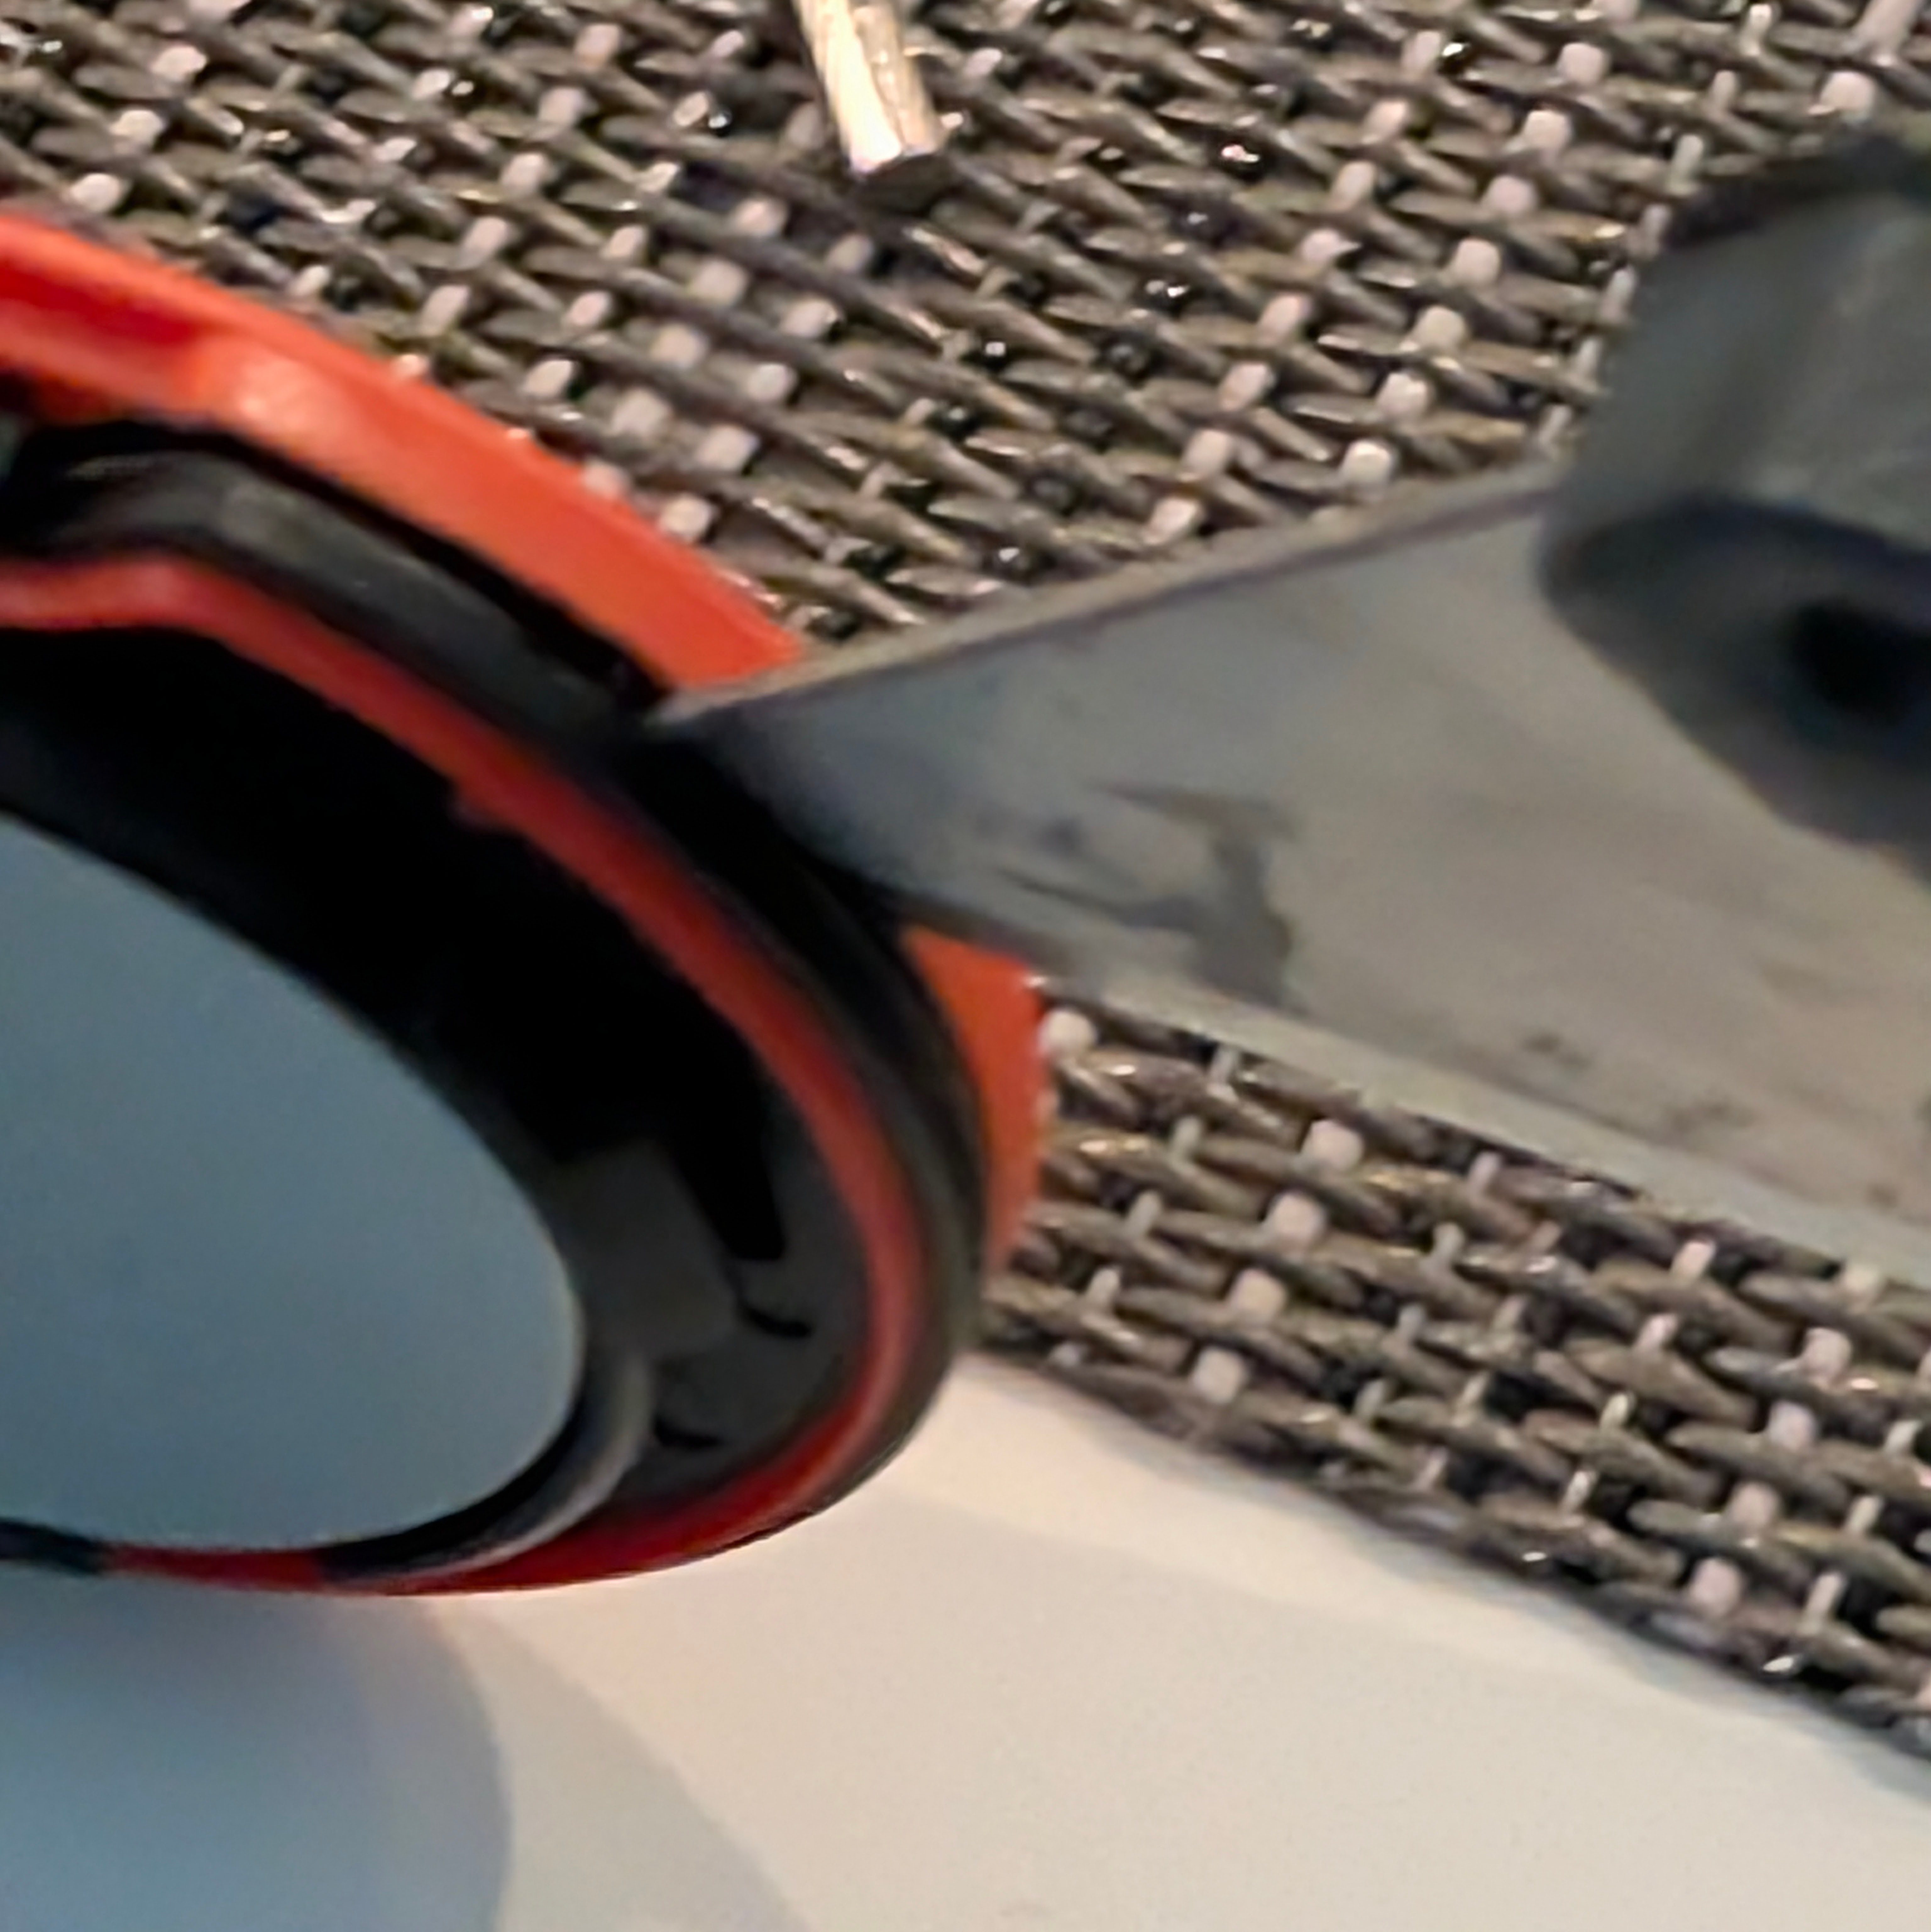
Insert a thin razor blade along the outer seam between the perimeter rim and the inner grey housing. Carefully work around the perimeter until the seal pops free.
Be careful not to scratch internal components: you only need to insert the tip of the blade 1–2 mm. This is the trickiest step of the process, but you get the hang of it quickly.
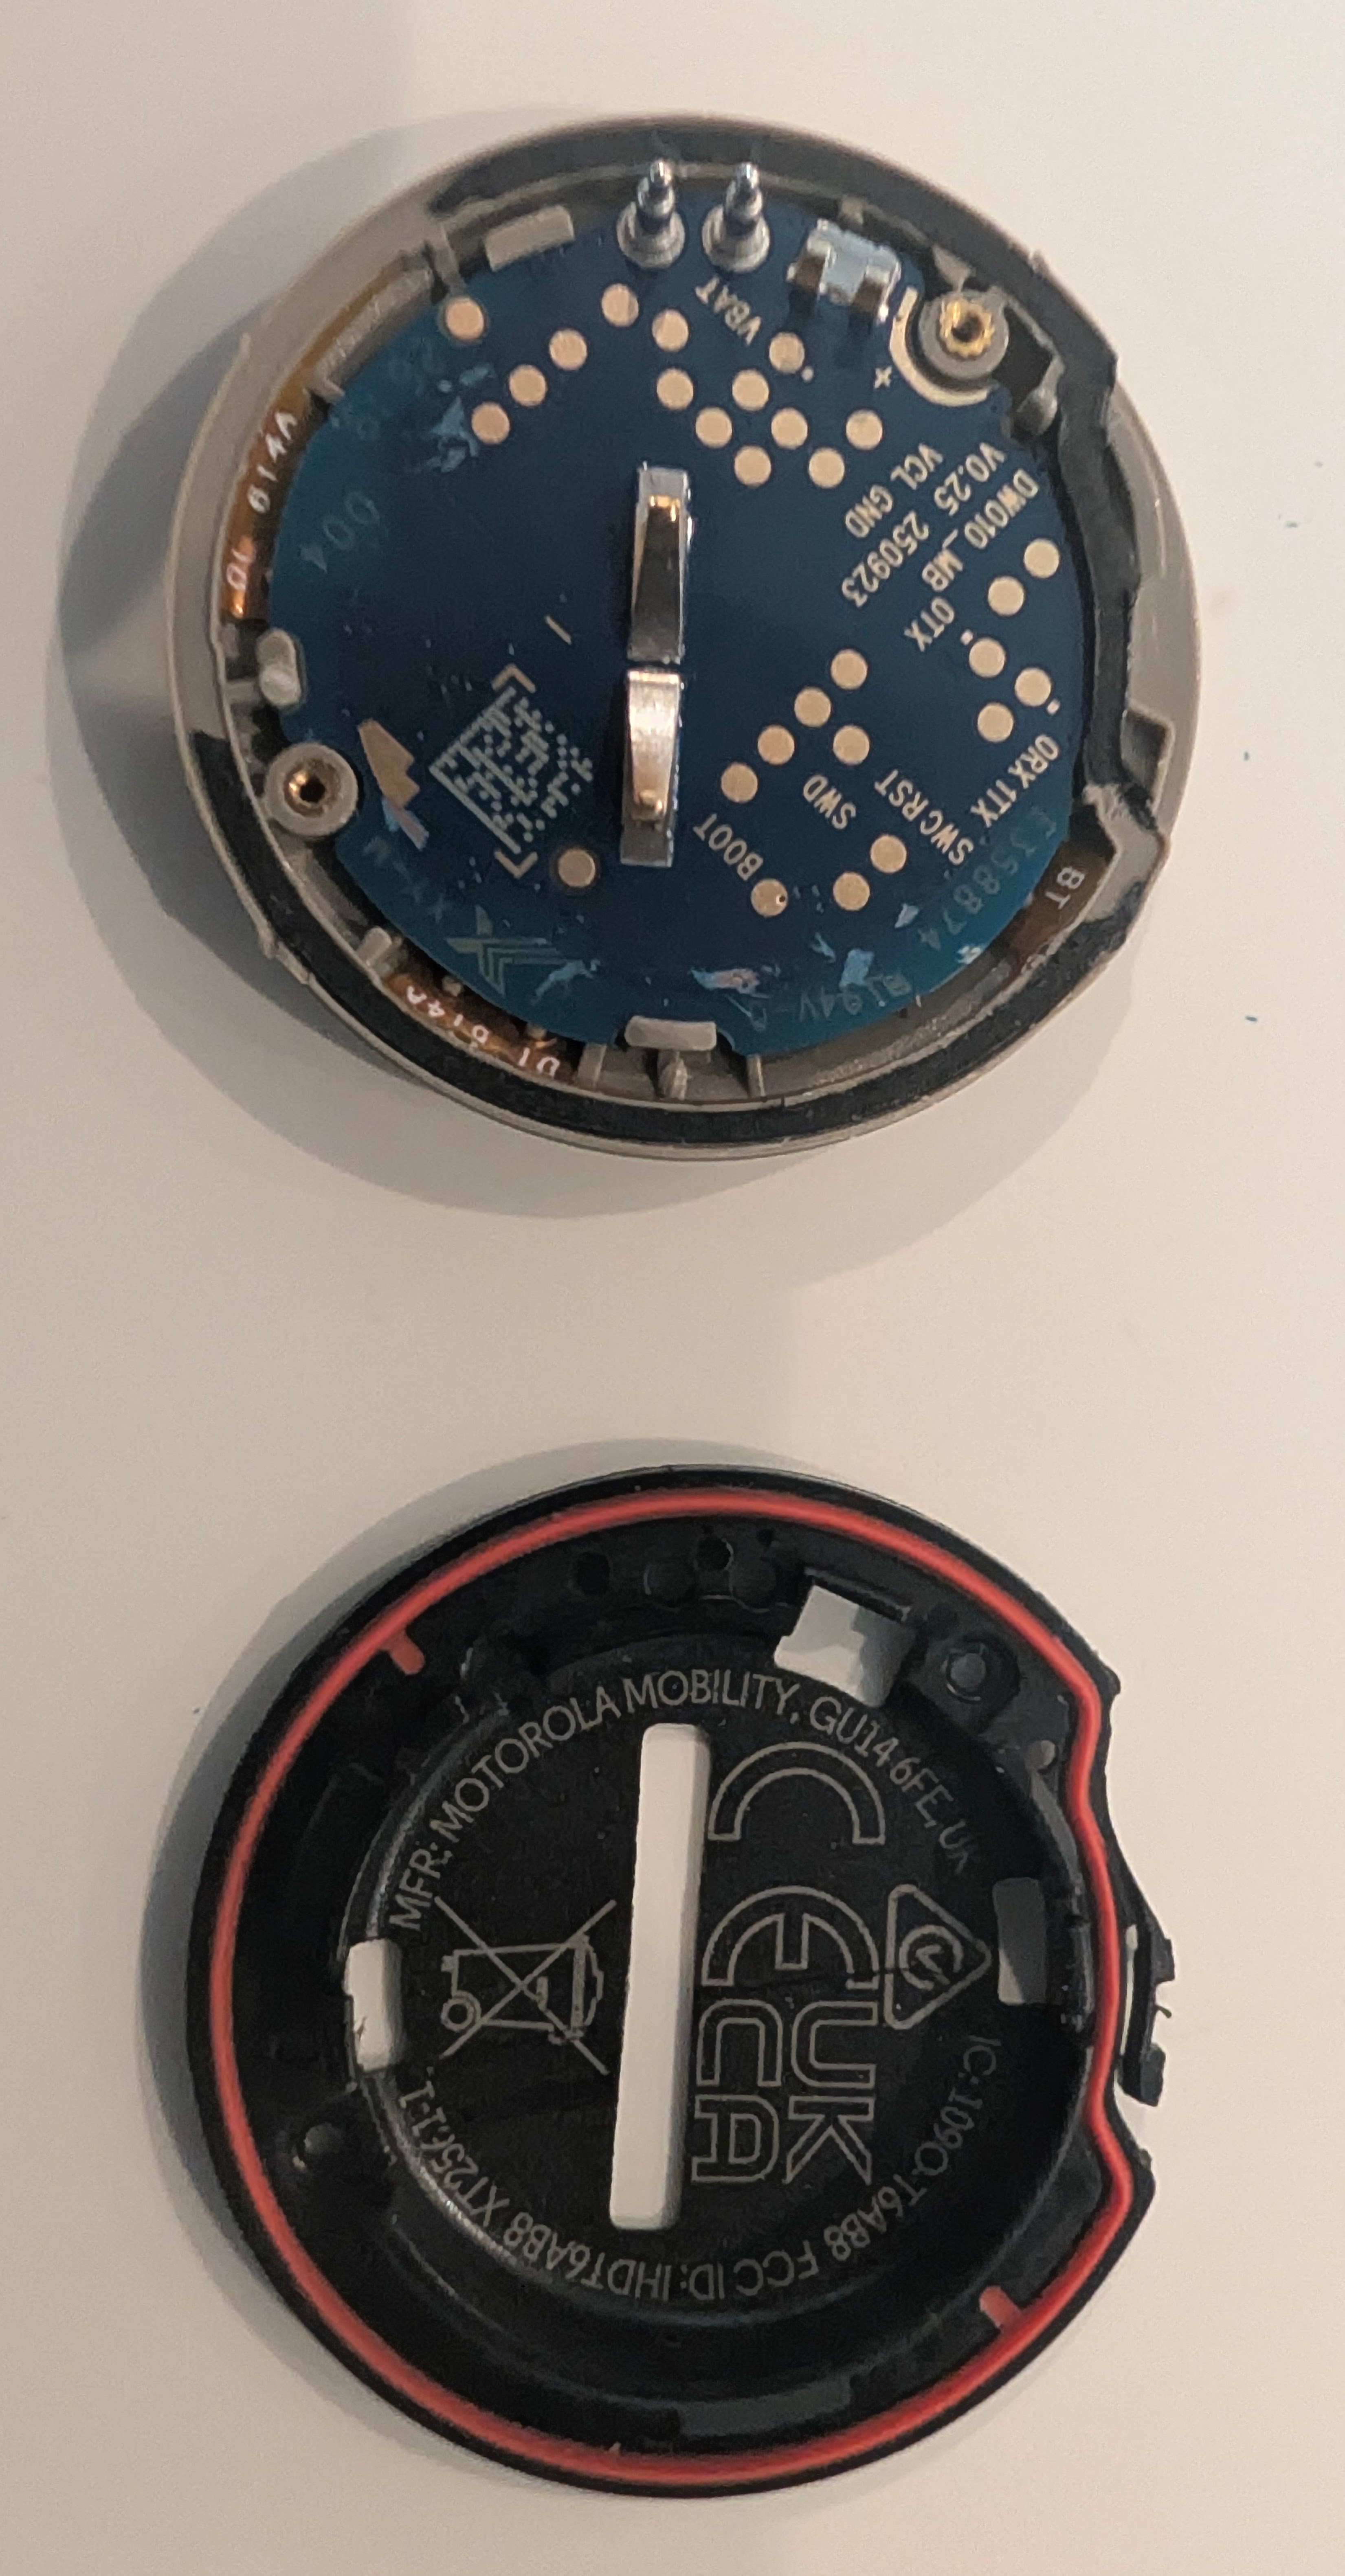
Once opened, you will see the two halves of the shell:
Step 4: Inspect the Internal Architecture
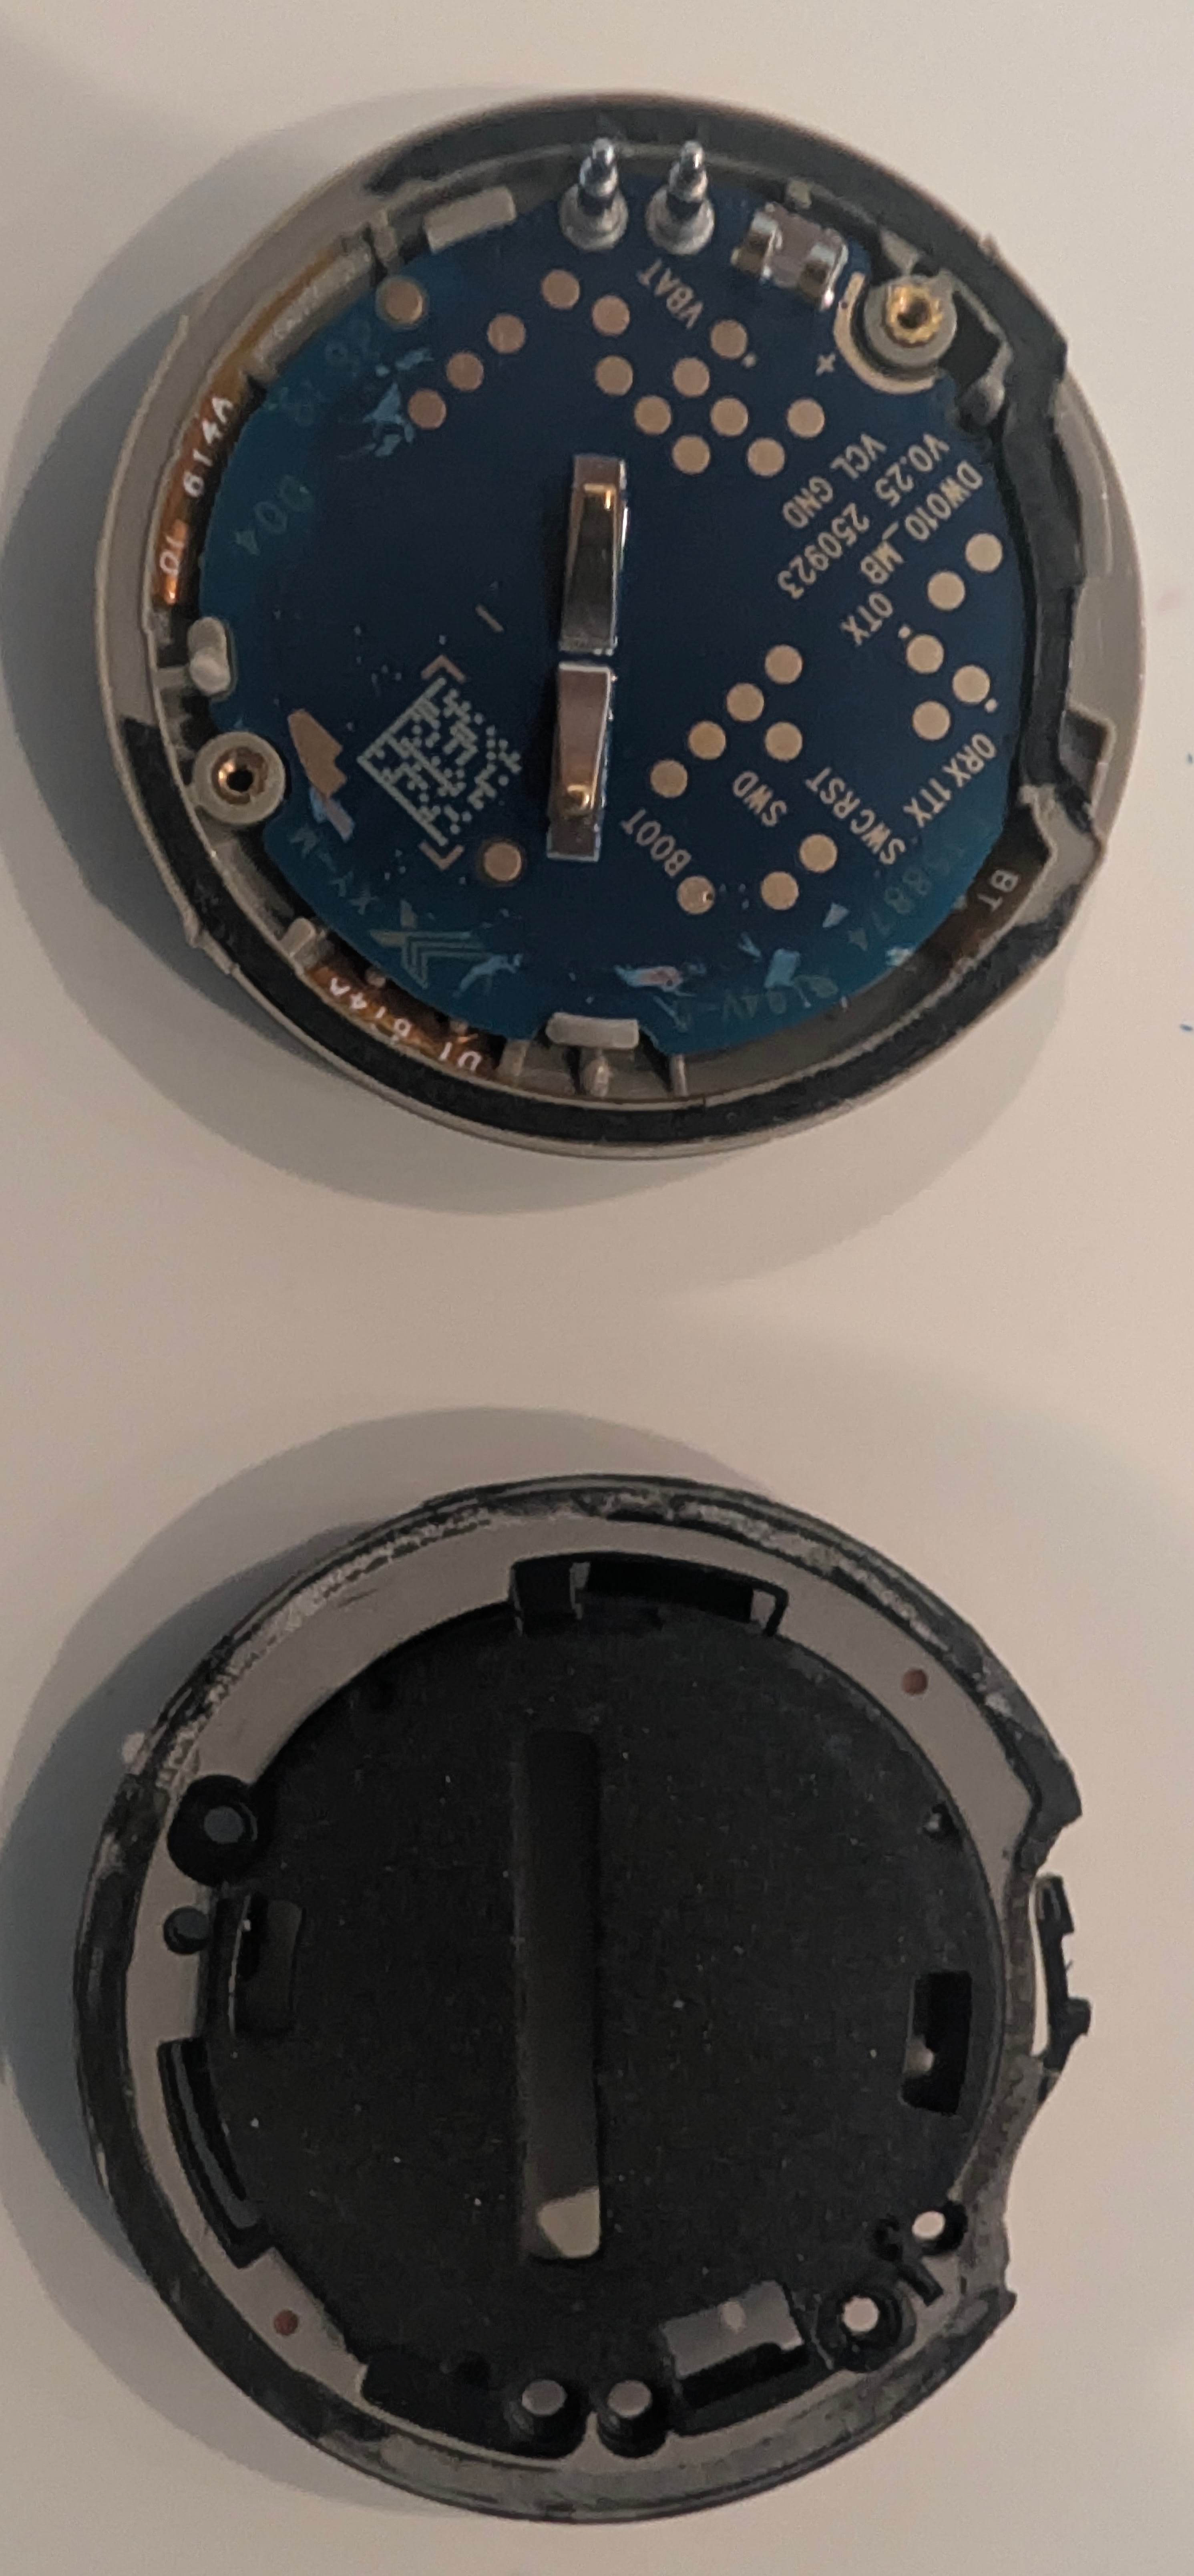
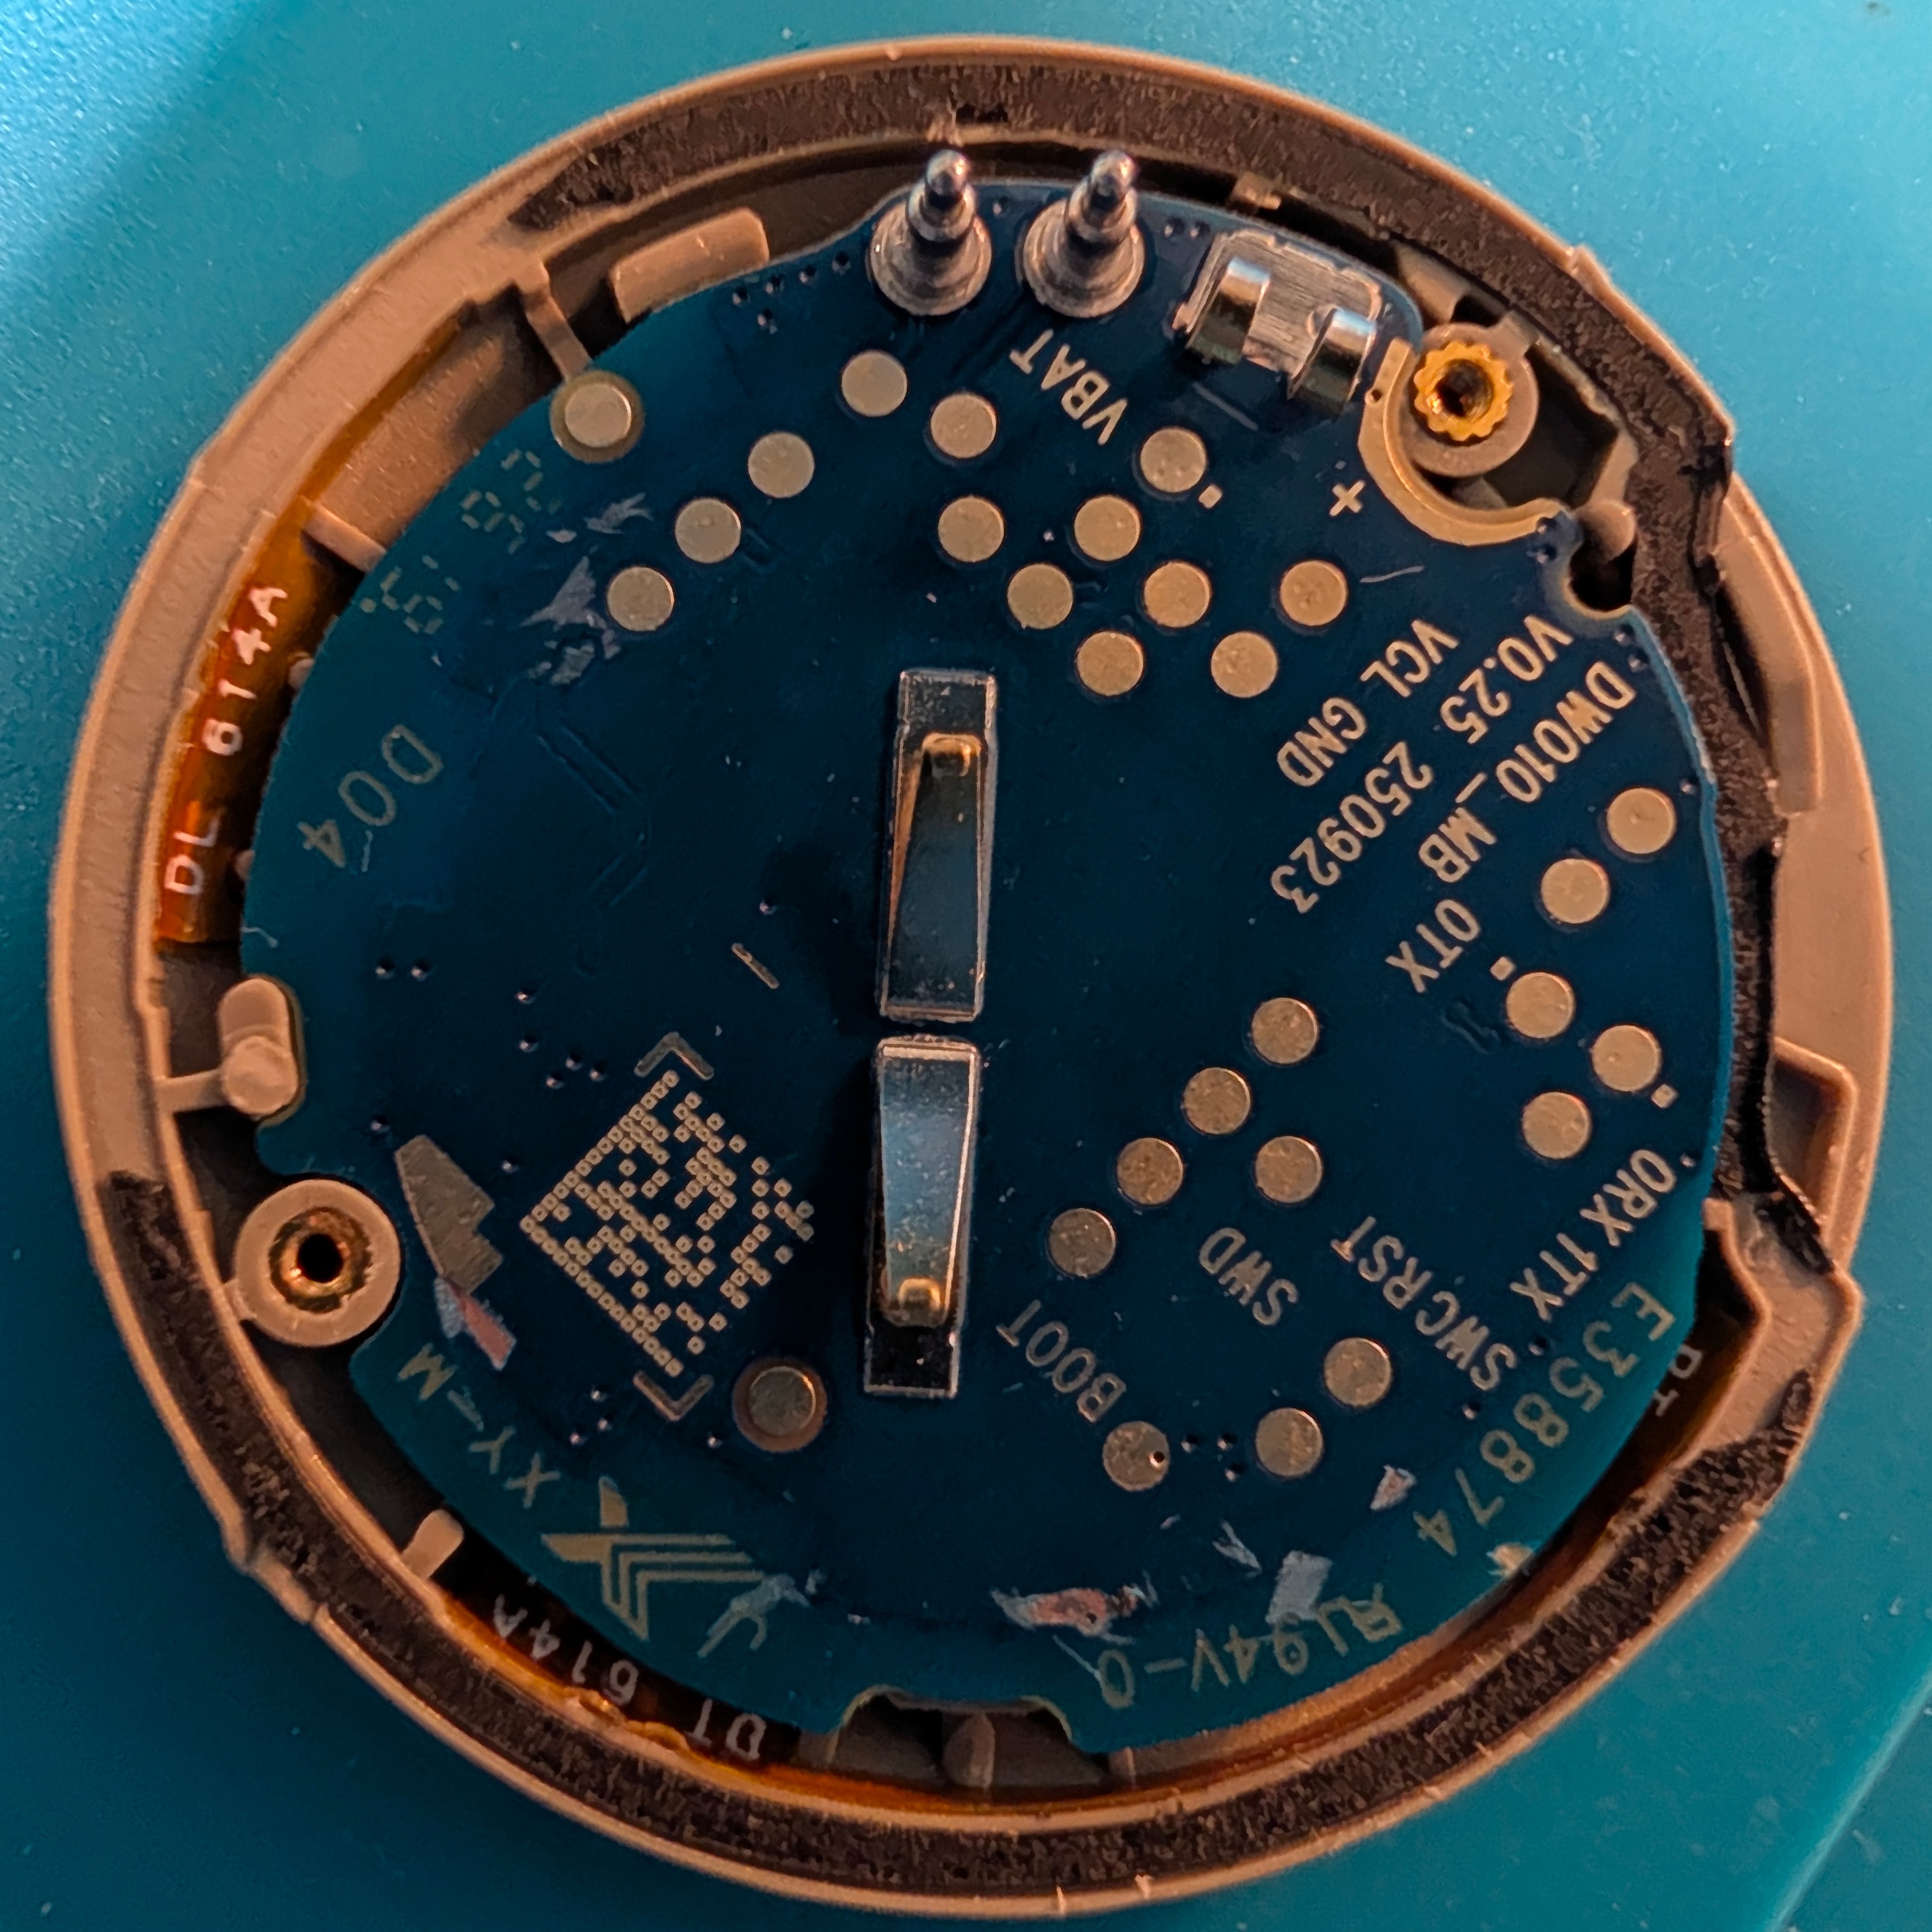
The exposed side of the PCB is the back, containing the battery clip and test pads:
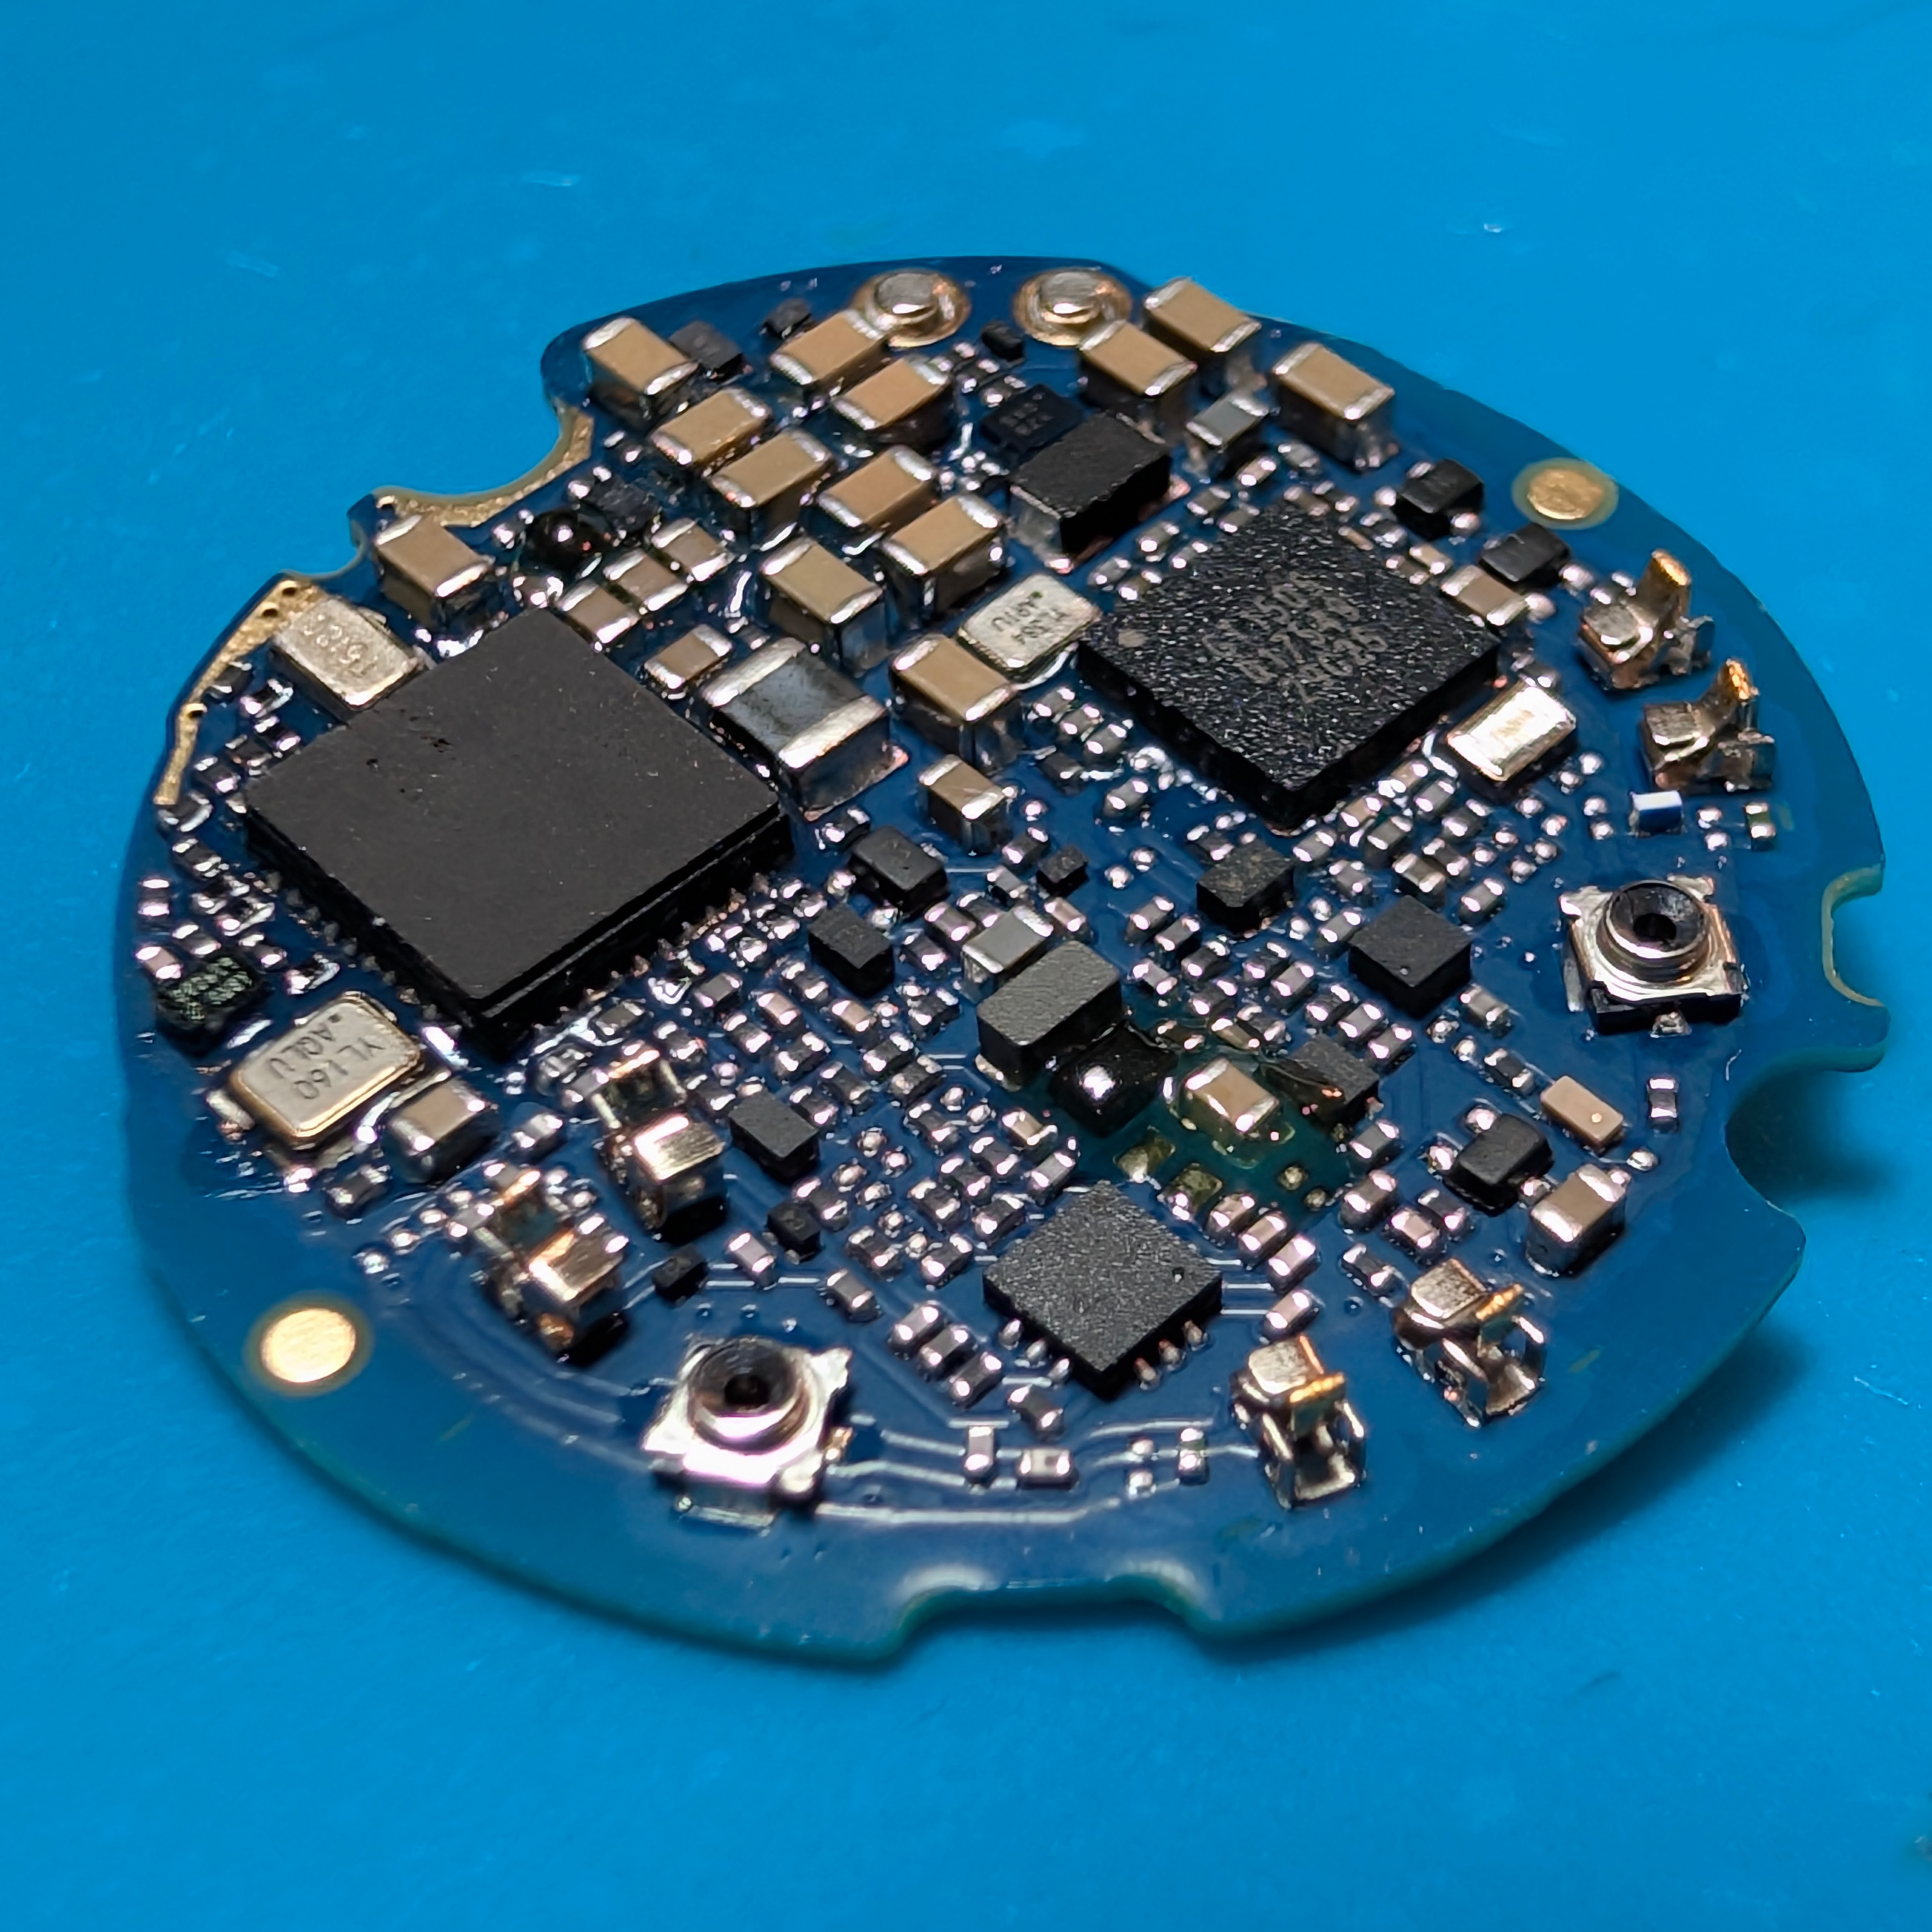
Carefully lift the PCB and flip it over to inspect the component side. It houses the main SoC, UWB controller, RF test ports, and gold spring contact fingers along the edge:
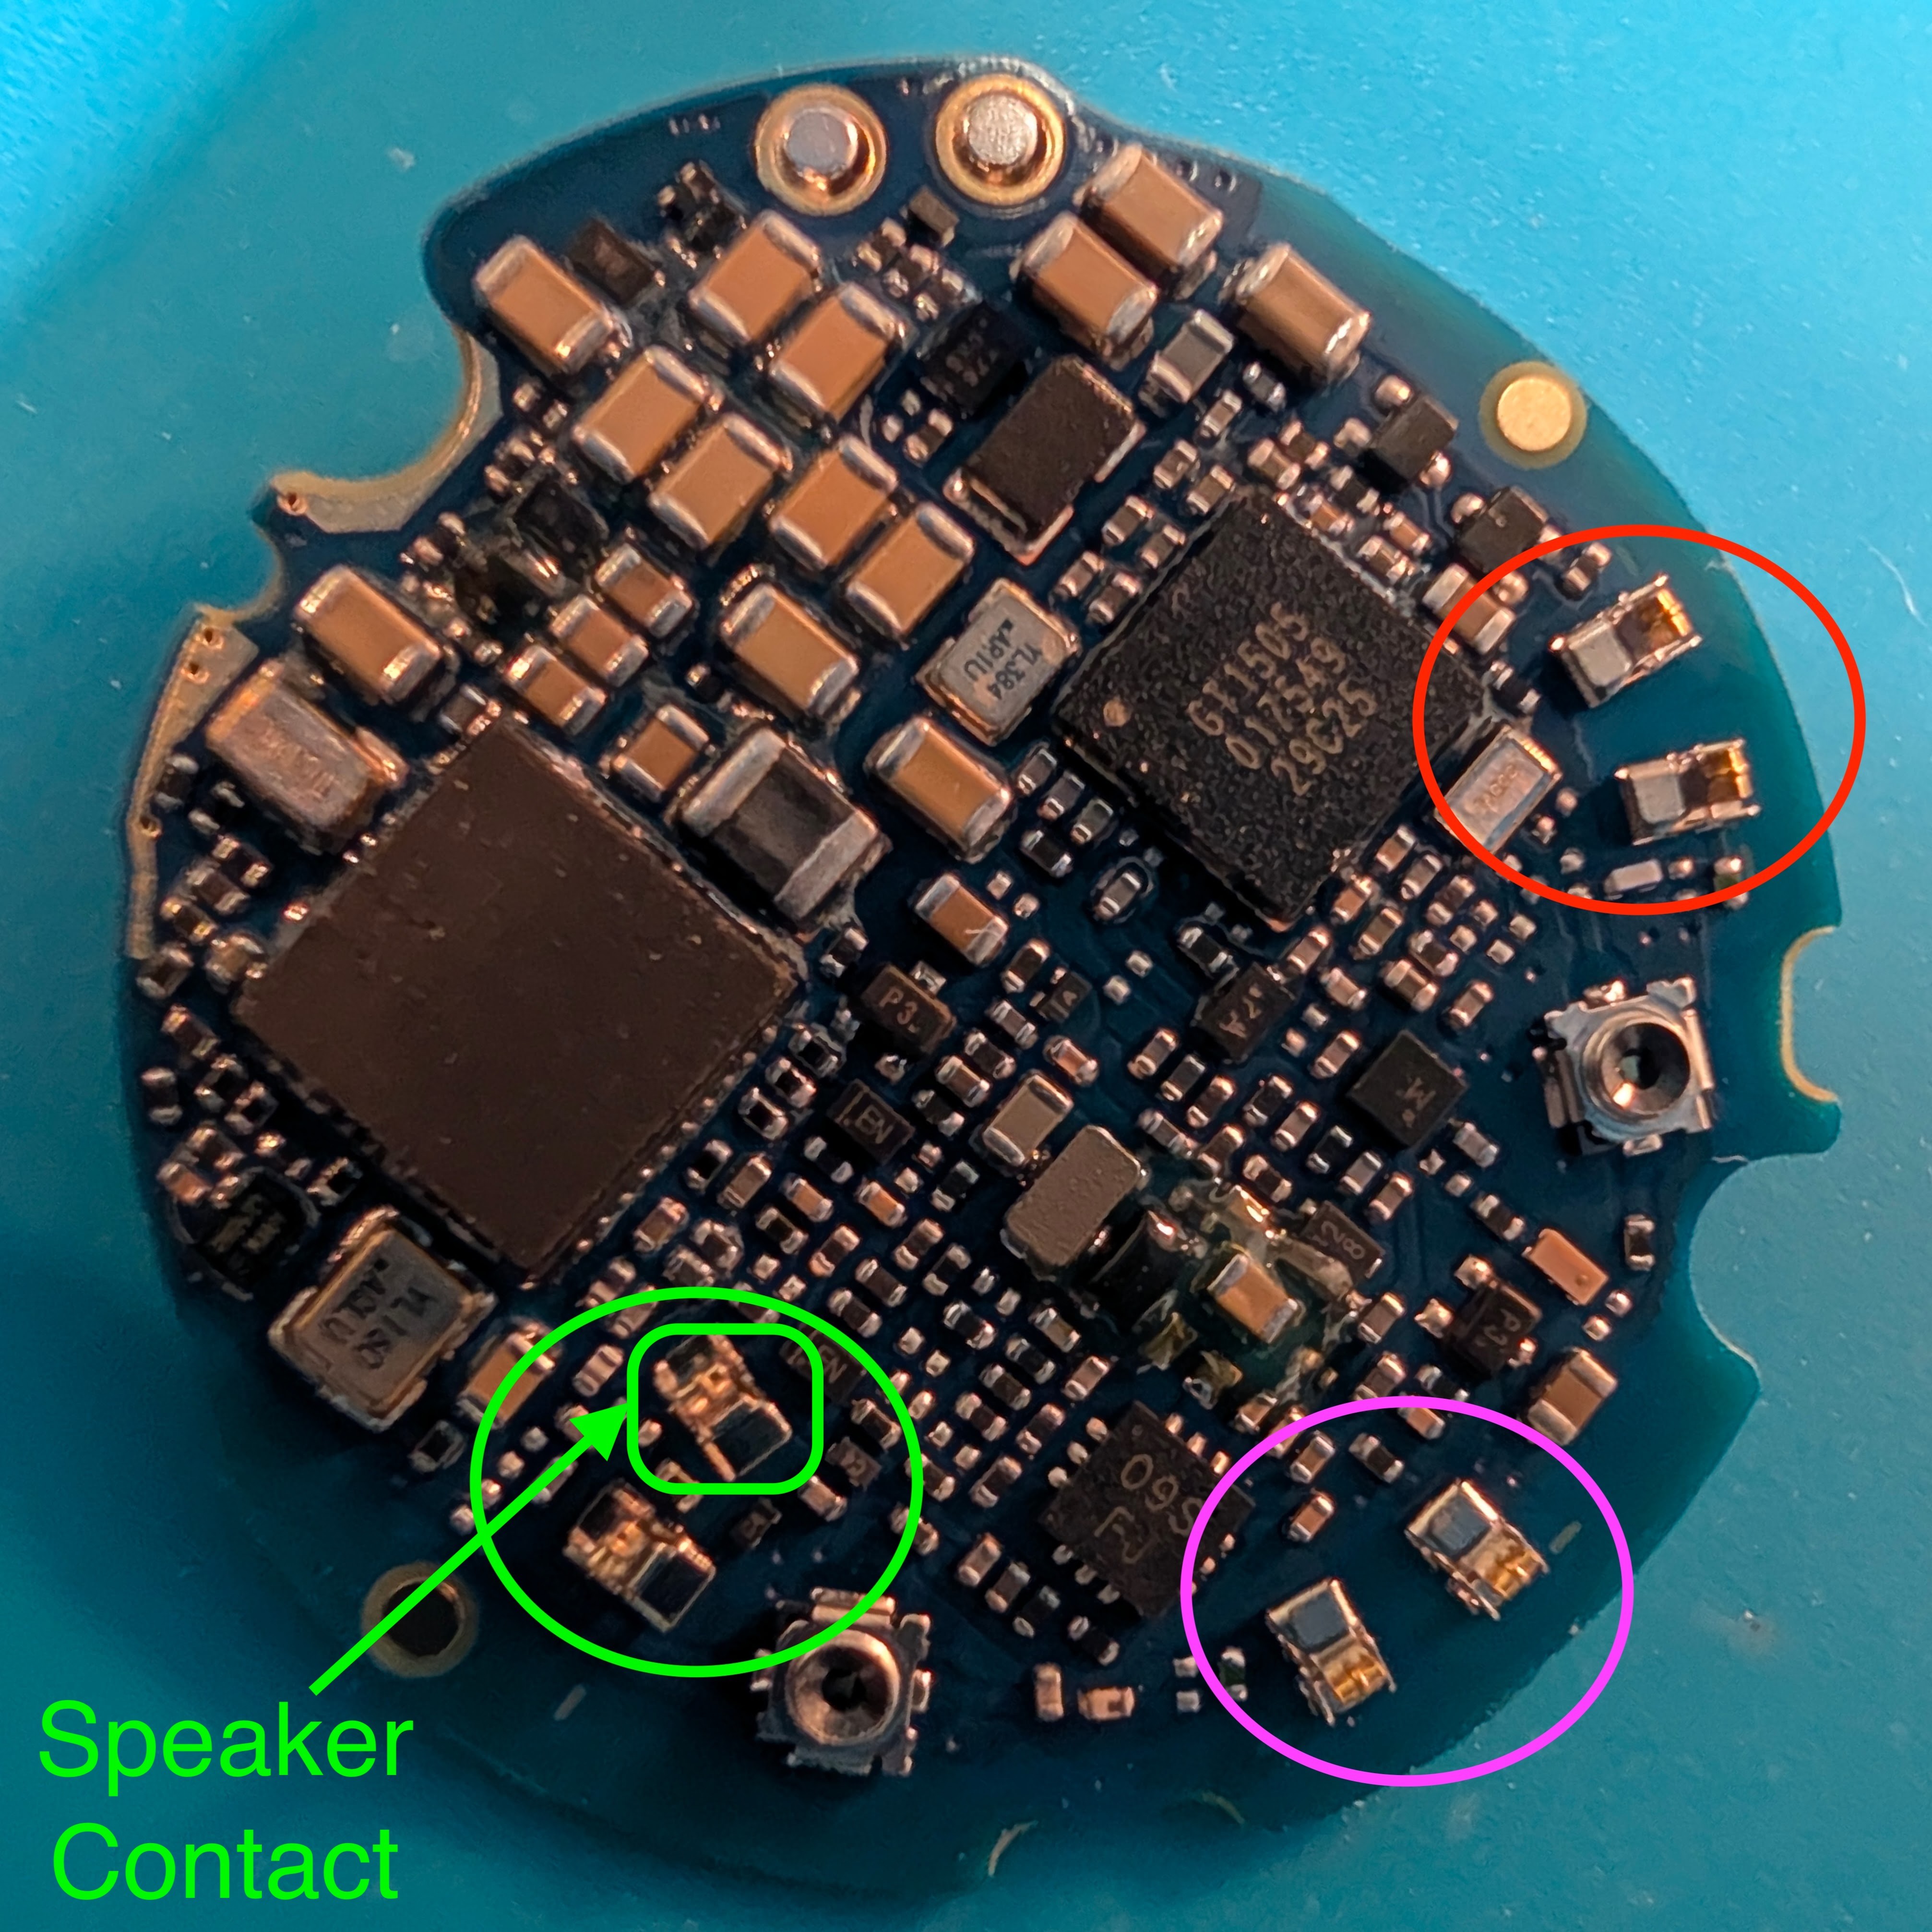
Here is a top-down view highlighting the spring contacts:
- Green circle: Speaker contact pin
- Red & purple circles: UWB and Bluetooth antenna pins
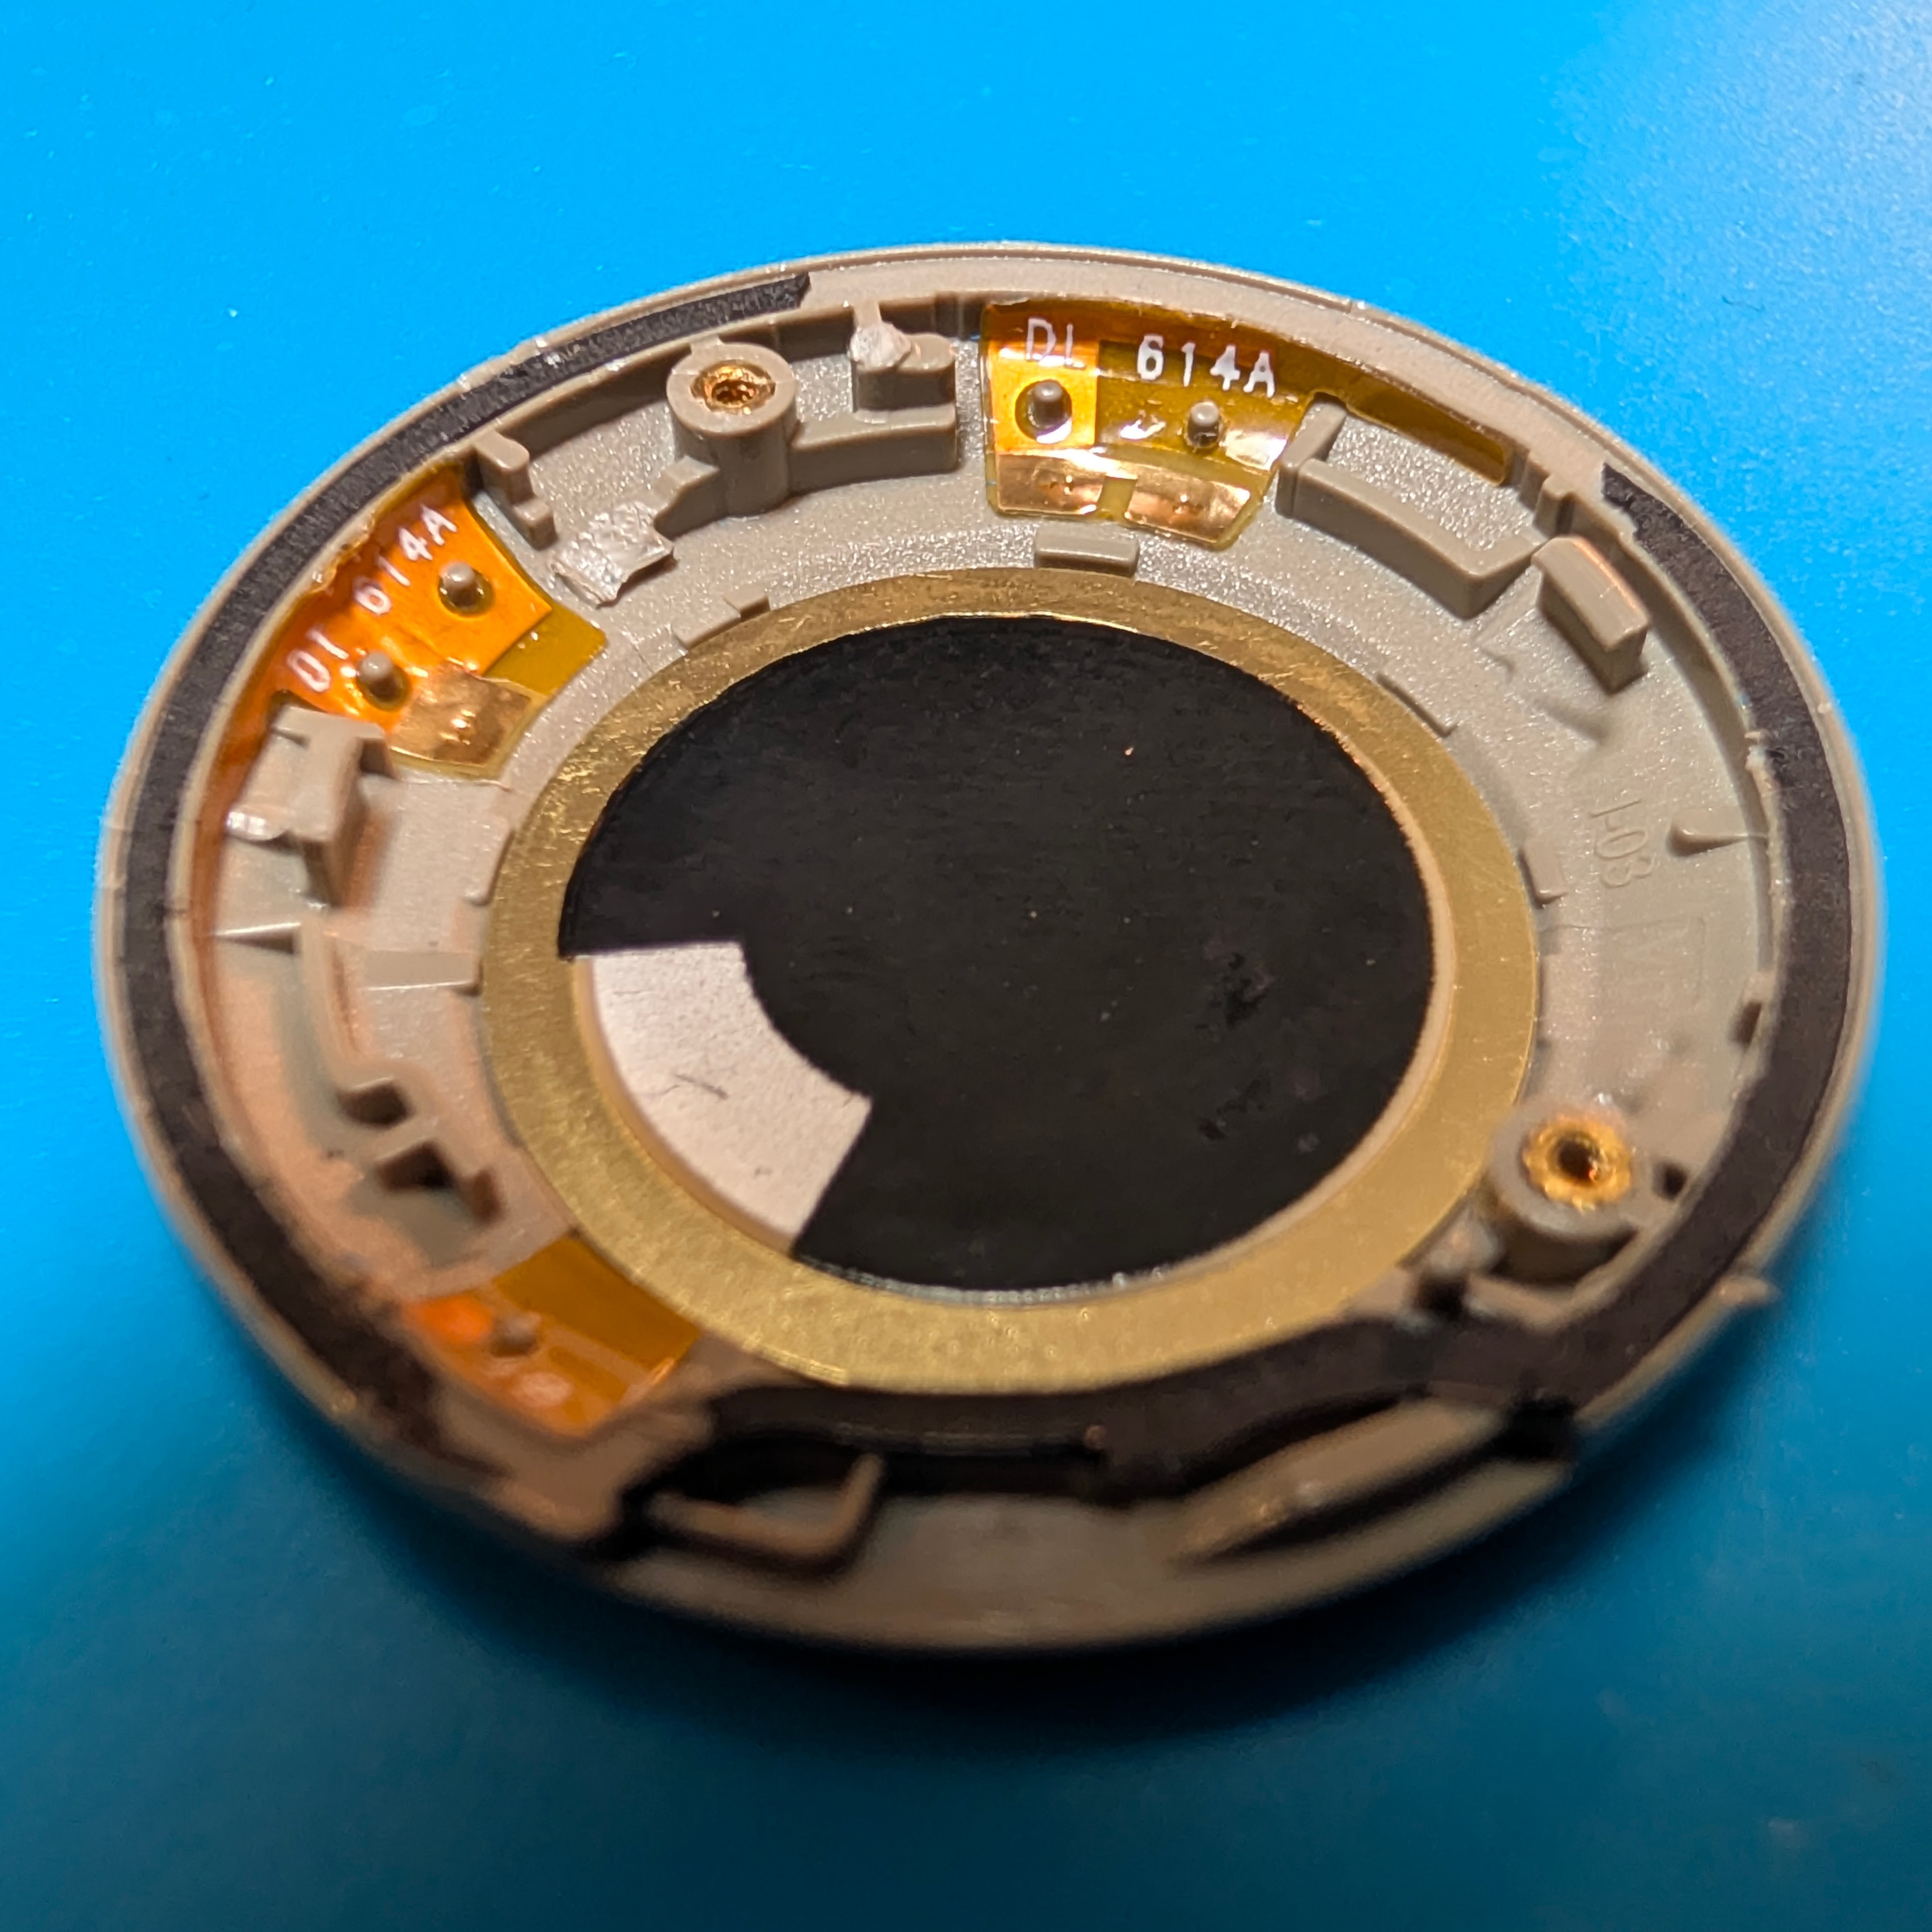
Now inspect the casing shell:
- Bluetooth Antenna: Flexible Printed Circuit (FPC) pad labeled
BT. - UWB Antennas: FPC pads labeled
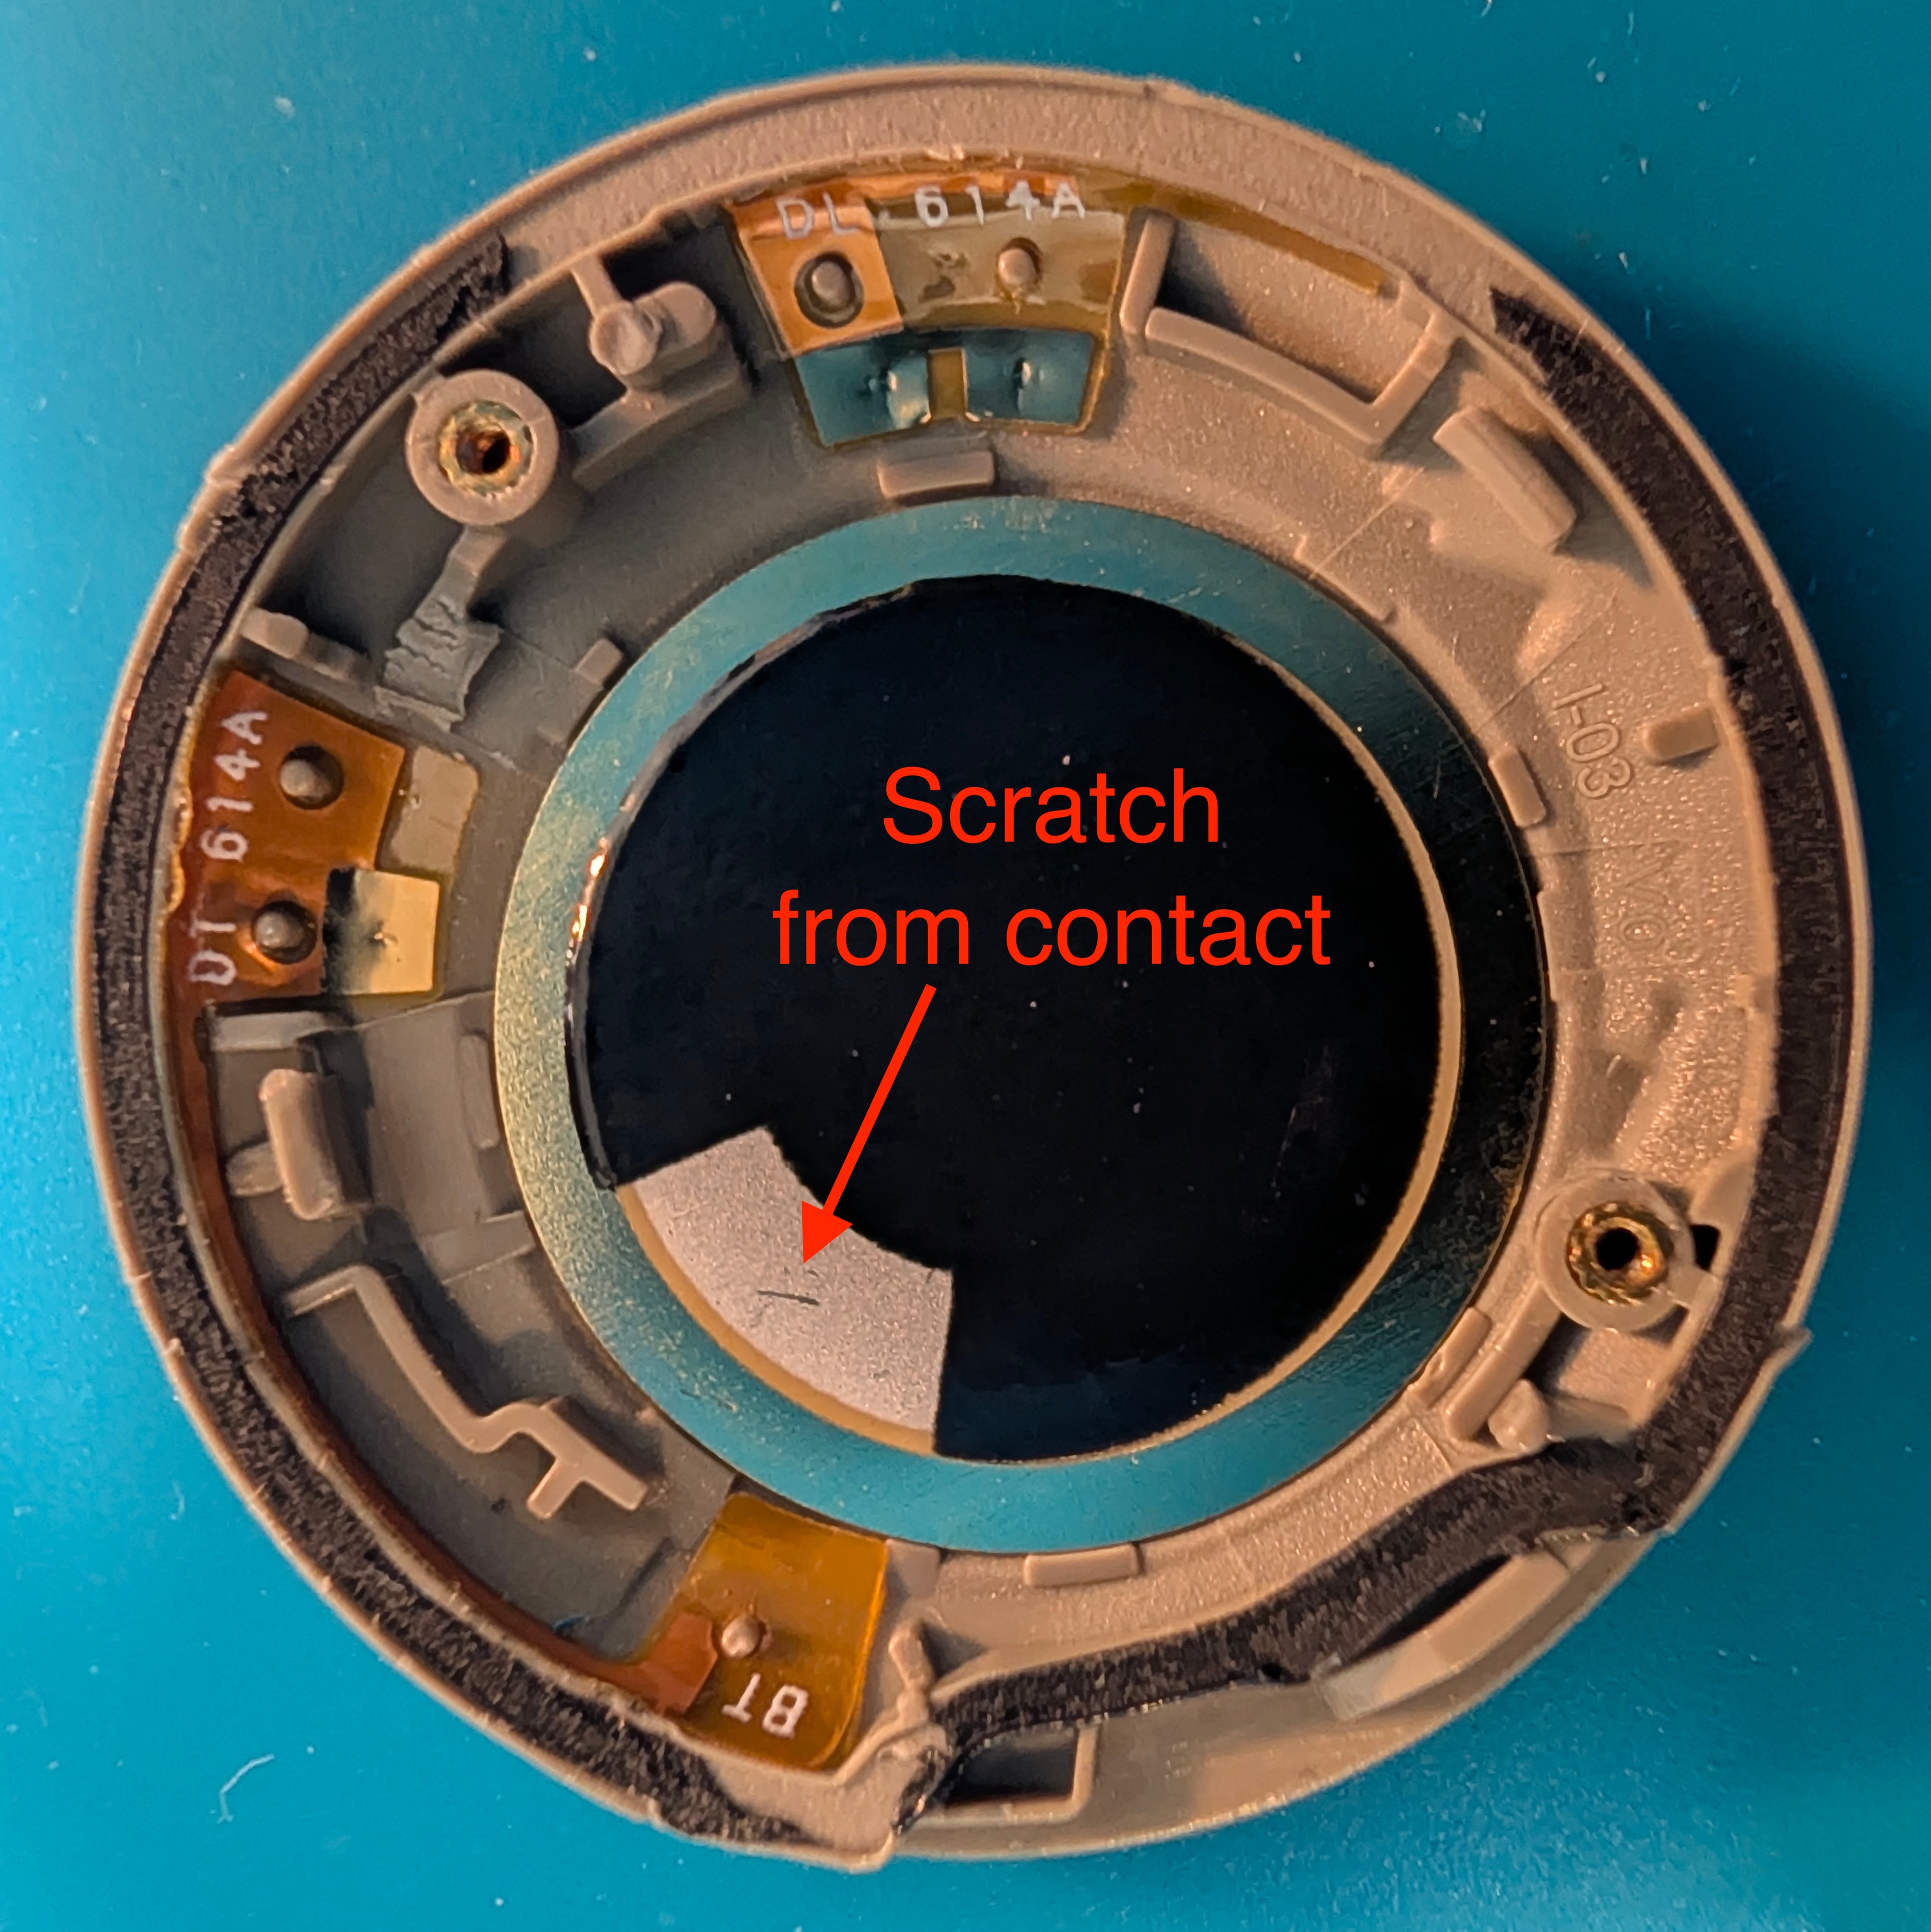
DL 614AandDT 614A. - Piezo Speaker: Central disc with a brass ground ring, black ceramic layer, and silver/white driving electrode patch.
Notice the distinct scratch mark on the silver electrode patch where the speaker spring pin makes contact:
Step 5: Insulate the Piezo Contact
Cut a tiny square of non-conductive Scotch tape or Kapton tape. Place it directly over the silver contact patch on the speaker.
Be careful not to tape over the outer brass ground ring:
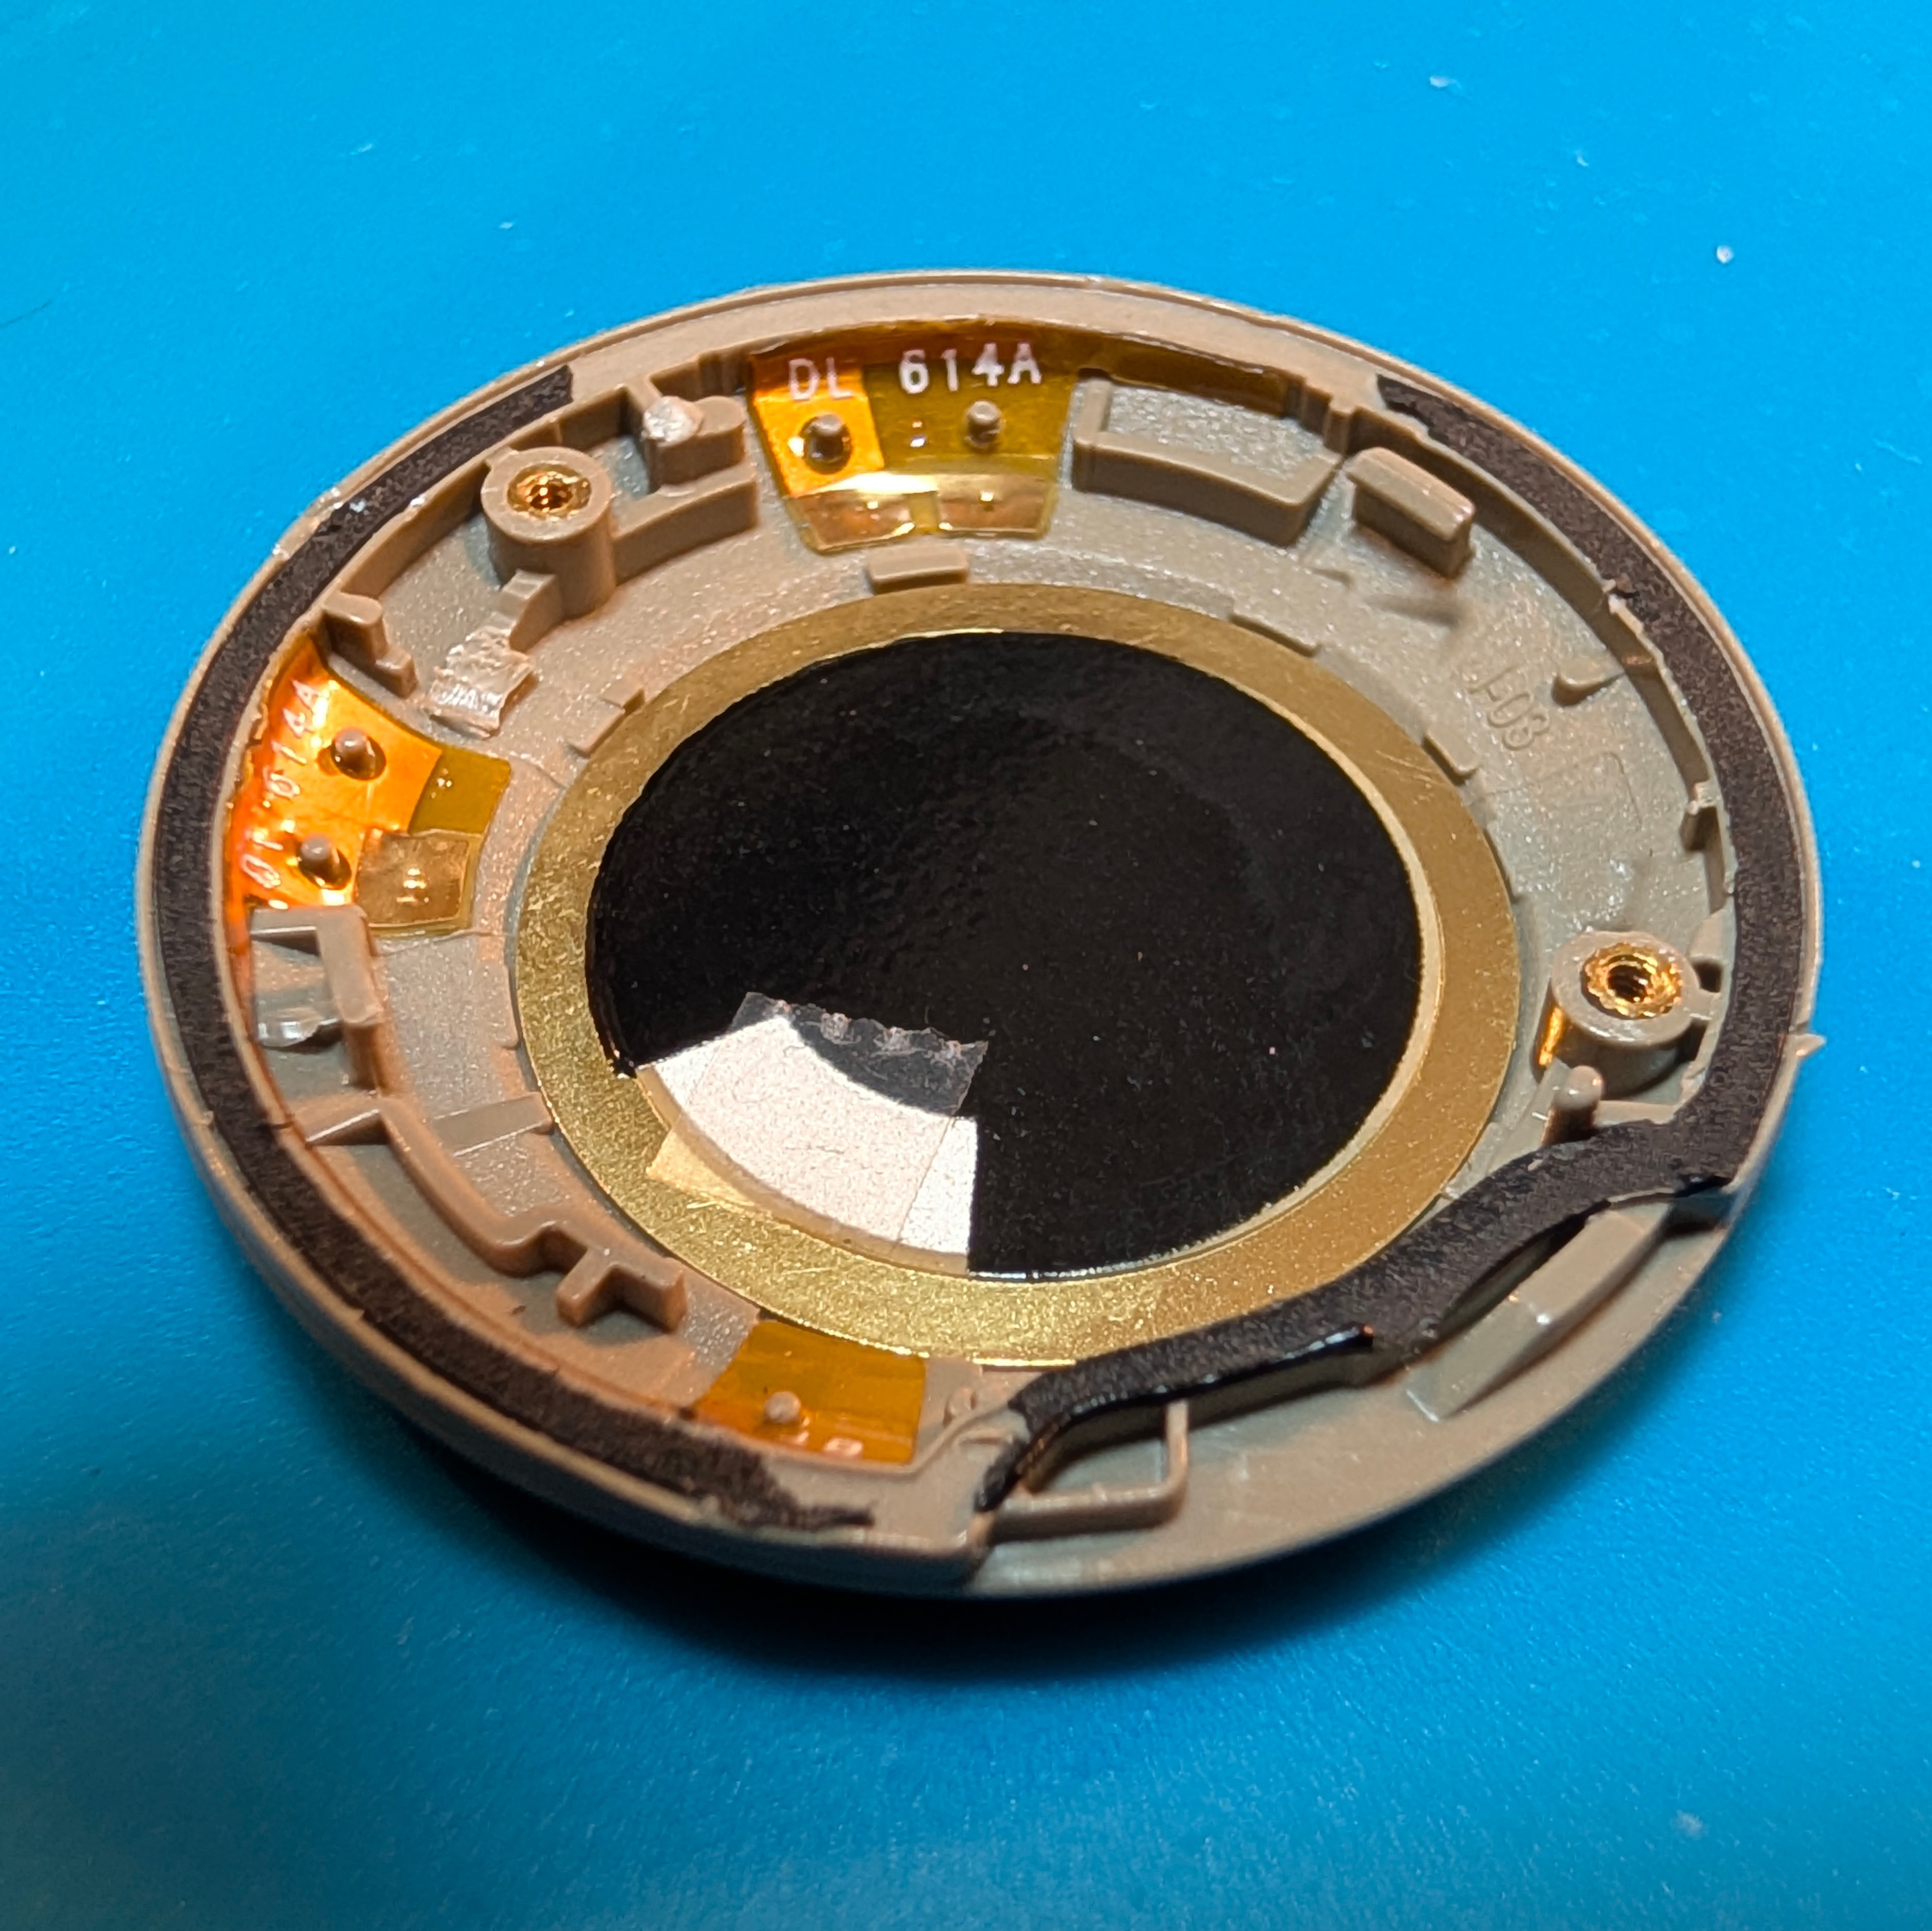
When reassembled, the corresponding PCB spring pin presses against the tape instead of the electrode, cleanly breaking the audio circuit without cutting traces or desoldering.
Verification
Open Google's Find My Device app:
- Play Sound: Tracker is completely silent (no chime, click, or buzz).
- Proximity & UWB Finding: Distance and directional guidance remain 100% operational.